main.tsx
//typescript 사용하려면 FC
import React,{FC, useState} from 'react'
import { Box, Text, Flex, Button } from "@chakra-ui/react";
import { mintAnimalTokenContract } from "../web3Config";

// typescrips는 이렇게 props를 모두 정해주어야함
interface MainProps {
  account: string;
}

const Main: FC<MainProps> = ({account}) => {
  const [newAnimalCard, setnewAnimalCard] = useState<string>();

  const onClickMint = async () => {
    try {
      if (!account) return;

      const response = await mintAnimalTokenContract.methods
        .mintAnimalToken() // 민팅 기능
        .send({ from: account }); // 누가 보냈는지

      console.log(response); // 결과를 출력함
    } catch (error) {
      console.error(error);
    }
  }

  return (
  	// css같은 기능
    <Flex
      w="full"
      h="100vh"
      justifyContent="center"
      alignItems="center"
      direction="column"
    >
      <Box>
      {newAnimalCard
      ? (<div>AnimalCard</div>)
      : (<Text>Let's mint Animal Card!!!</Text>)}
      </Box>
      <Button mt={4} size="sm" colorScheme="blue" onClick={onClickMint}>
        Mint
      </Button>
    </Flex>
  );
};

export default Main;
완성본
Mint 버튼을 누르고 확인을 누르면 민팅이 완료된다.

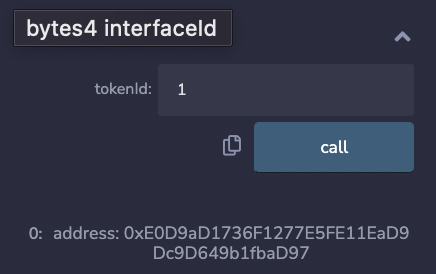
민팅 결과 확인하기
contract > index.ts 파일을 web3Config.ts로 바꾼후 contract 디렉토리는 삭제했다.
web3Config.ts
const mintAnimalTokenAddress = "민팅한 주소";
const saleAnimalTokenAddress = "판매 목록에 넣은 주소";
mintAnimalTokenAddress를 가져다 AtAddress에 넣어서 이전에 민팅한 결과를 가져온다.

가져온 민팅결과를 눌러 소유자(owner of)를 확인하면 현재 내 주소와 같다는 것을 확인할수 있다.

animalTypes를 확인하면 내 경우엔 숫자 3이 나온다.
1~5번 중에서 랜덤으로 선택한 결과, 3번을 민팅했다는 것을 알 수 있다.

github
https://github.com/h662/h662Animals-frontend/commit/08b9e61dec65658114d20faf7fdd9b839f4f0e65
'프로그래밍 > solidity' 카테고리의 다른 글
| [220517] 마이페이지 헤더 만들기 (0) | 2022.05.17 |
|---|---|
| [220517] 민팅한 결과에 맞는 이미지를 가져오기 (0) | 2022.05.17 |
| 메타마스크를 뭄바이 테스트 서버와 연결하기 / 테스트 코인 받기 (0) | 2022.05.17 |
| [220517] 리액트와 메타마스크 연결하기 (0) | 2022.05.17 |
| [220517] frontend 설치 / chakra-ui (0) | 2022.05.17 |


댓글