이전 포스팅에서 이어지는 포스팅
https://hancoco.tistory.com/264
[220701] GETH로 RPC 통신하기 / 메타마스크 연결하기
사용할 디렉토리에 geth 세팅하기 node 파일 안에 keystore 디렉토리가 생성되며 account 파일이 생성하는 코드. $ mkdir `node` $ source ~/.bash_profile $ geth --datadir node account new node 파일 안에 ke..
hancoco.tistory.com
jest 세팅하기
$ npm init -y
$ npm install web3 jest
다음 파일들을 생성해준다.
// package.json
"scripts" : { "test":"jest" },


// .eslintrc
{ "extends": ["plugin:prettier/recommended"] }


// .prettiercc
{
  "printWidth": 120,
  "tabWidth": 2,
  "singleQuote": true,
  "trailingComma": "all",
  "semi":false
}


// jest.config.js
const config = {
  verbose: true,
  testMatch: ["<rootDir>/**/*.test.(js|ts)"],
}
module.exports = config


//block.test.js
const Web3 = require("web3");
describe("Block", () => {
  let web3;
  it("web3 연결 테스트", () => {
    console.log("hello world");
  });
});
잘 작동되는지 테스트.
$ npm run test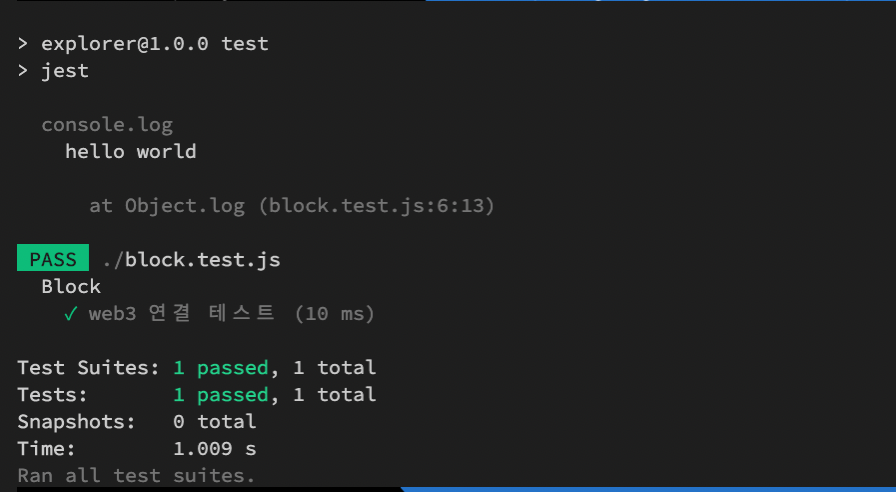
만들어 놓은 블록 갯수를 가져오는 법
// block.test.js
it("web3 연결 테스트", async () => {
    web3 = new Web3(new Web3.providers.HttpProvider("http://127.0.0.1:9000"));

    // web3.eth 모듈에서 blockNumber 메소드 값을 가져오기
    const block_number = await web3.eth.getBlockNumber();
    console.log(block_number);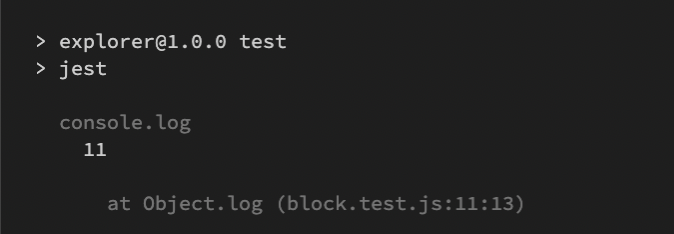
특정 블럭의 정보를 가져오는 법
따로 메소드는 없고 반복문으로 돌려서 블록 정보를 가져오면 된다.
너무 많은 정보를 가져오려고하면 멈추니 주의할것.
// block.test.js
const block = await web3.eth.getBlock(11, true);
console.log(block);
http서버에 접속한 상태로 geth 메서드 사용하기
$ geth attach http://localhost:9000
$ personal.newAccount('1234')
// >> "0x596161654742fc9f0315e54fcee4f08ae0eff7f5"

$ eth.coinbase
// >> "0x172e8612e90e6ce05068e87e2fbe04bf4f505b6f"
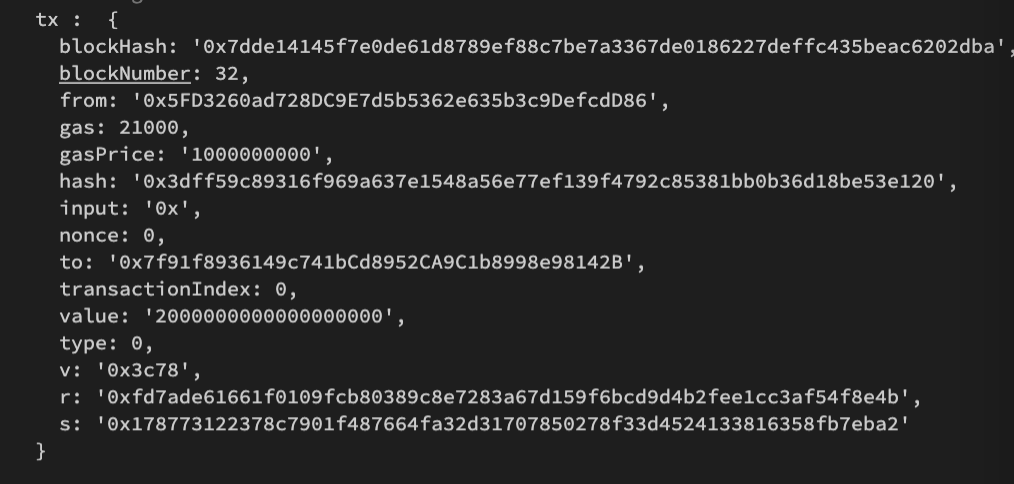
Tx 생성하기
코인베이스에서 특정 계정에게 2 eth를 보내는 트랜젝션을 생성하는 코드를 만들었다.
$ personal.sendTransaction({ \
from:eth.coinbase \
,to:'0x7f91f8936149c741bcd8952ca9c1b8998e98142b' \
,value:web3.toWei(2,"ether")} \
,"1234") // 비밀번호
하지만 2 eth를 받아야할 계정의 잔액을 살펴보면 여전히 0이다.
왜냐하면 트랜젝션풀(txpool)에 tx가 아직 처리되지 않은 상태(pending)이기 때문이다.
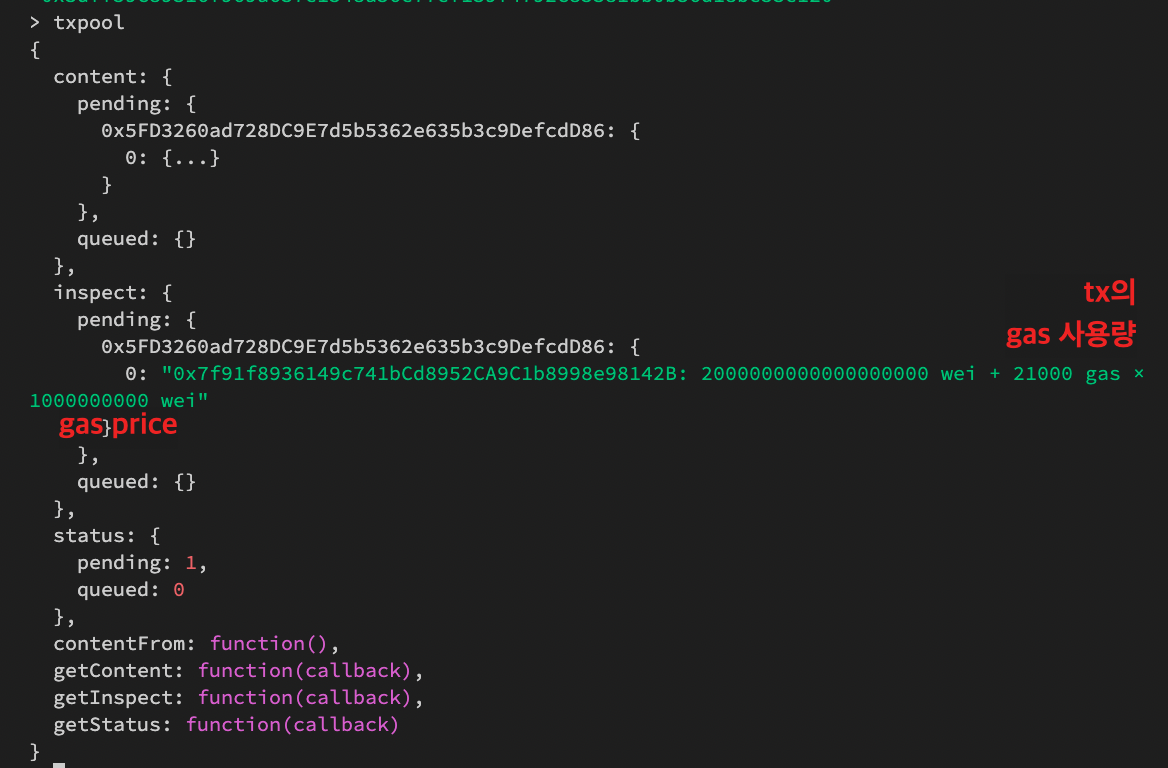
pending 상태를 해지하려면 블럭을 생성해야한다.
그래야 txpool에 쌓인 정보들이 블럭에 들어가며 txpool이 비워지기 때문이다.
$ miner.start()
$ miner.stop()
$ txpool
보낸 2eth가 잘 전송된 것을 볼 수 있다.

이제 생성된 tx 값을 확인해보자
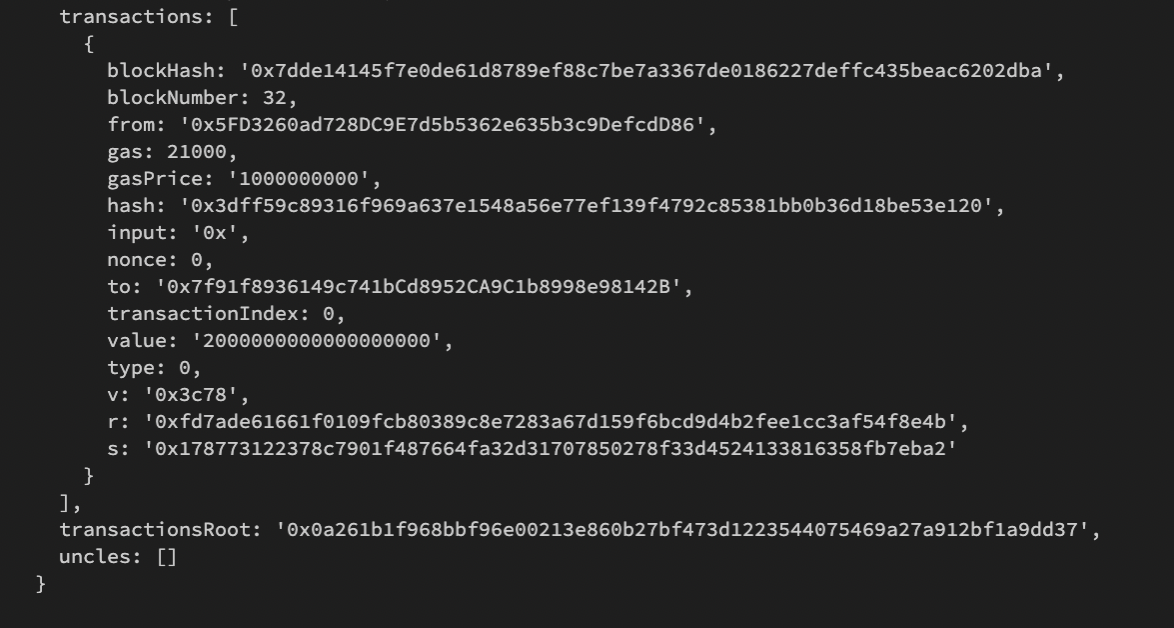
Tx값을 확인하는 두가지 방법
getTransaction()
사용자가 서명까지 완료한 데이터의 결과물을 보여줌. (txpool의 내용)
메타마스크에서 보내주는 정보 수준.
getTransactionReceipt()
geth가 tx내용을 실질적으로 넣었던 내용들. (block의 내용)
tx가 evm을 거쳤다가 나온 실질적인 블록 내용들.
사용한 가스량을 알고싶을때 사용.
tx값을 가져오는 것은 같지만, 가져오는 시점이 서로 다르다.
// block.test.js
it("getTransaction", async () => {
    const tx = await web3.eth.getTransaction(
      "0x3dff59c89316f969a637e1548a56e77ef139f4792c85381bb0b36d18be53e120"
    ); // txHash
    console.log("tx : ", tx);
});

it("getTransactionRecipt", async () => {
    const tx = await web3.eth.getTransactionReceipt(
      "0x3dff59c89316f969a637e1548a56e77ef139f4792c85381bb0b36d18be53e120"
    );
    console.log("tx Recipt : ", tx);
});

'프로그래밍 > typescsript' 카테고리의 다른 글
| 타입스크립트의 함수 (0) | 2022.11.21 |
|---|---|
| 타입스크립트의 타입 (0) | 2022.10.11 |
| [220630] 이더리움 private 네트워크 생성 / peer 연결하기 (0) | 2022.07.08 |
| [220701] GETH로 RPC 통신하기 / 메타마스크 연결하기 (0) | 2022.07.06 |
| [220630] GETH를 통해 실제 이더리움 네트워크와 연결하기 (0) | 2022.07.06 |


댓글