cookie와 cookie-parser에 관한 설명은 아래글을 참고하자.
https://hancoco.tistory.com/126
[220314] 미들웨어 body-parser와 cookie-parser
body-parser node.js의 모듈 중 하나이며, post request body에서 파라미터를 편리하게 추출해주는 미들웨어다. app.post('/login',(req,res)=>{ console.log(req.body) } 가장 흔하게 쓰는 예시인 req.body는 사실 body-parser를
hancoco.tistory.com
https://inpa.tistory.com/entry/JS-%F0%9F%93%9A-%EC%BF%A0%ED%82%A4Cookie-%EB%8B%A4%EB%A3%A8%EA%B8%B0
[JS] 🍪 자바스크립트로 쿠키(Cookie) 다루기
Cookie란? Cookie는 데이터이면서, 우리가 현재 사용하는 컴퓨터에 작은 텍스트파일로 저장되어있는 것이다. 어떤 사이트에 접근을 하고 '하루 동안 이 창을 보지 않기'라는 문구를 본적이 있는가
inpa.tistory.com
[EXPRESS] 📚 bodyParser / cookieParser 미들웨어 💯 사용법 정리
노드 - cookie 다루기 생 노드에서 http 모듈을 쓸때는, 이렇게 일일히 쿠키 설정을 코딩해 줘야 했었다. // 쿠키 문자열을 자바스크립트 객체로 변환하는 함수 const parseCookies = (cookie = '') => cookie .spli
inpa.tistory.com
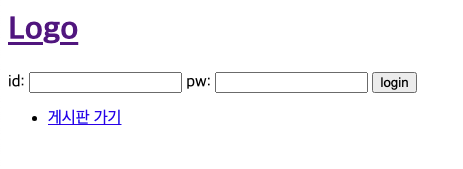
1. 로그인 폼을 만든다.
<h1>
	<a href="/">Logo</a>
</h1>

<!-- 로그인 폼 자리 -->
<form method="post" action="/login">
    id: <input type="text" name="userid">
    pw: <input type="text" name="userpw">
    <input type="submit" value="login">
</form>

<ul>
    <li>
      <!-- /list로 이동한다 -->
        <a href="/list">게시판 가기</a>
    </li>
</ul>
2. 로그인을 했을때 쿠키가 생기도록 만들자.
우선 로그인을 했을때 쿠키가 있는지 확인을 해보면 없는걸 알 수 있다.
const cookieParser = require('cookie-parser');
app.use(cookieParser())

let user = {
  userid: 'aaa', userpw: '111', username: "jjj"
}

app.post('/login', (req, res) => {
  //전달받은 값을 변수에 각각 넣는다
  const userid = req.body.userid;
  const userpw = req.body.userpw;

  //로그인이 성공했을 경우
  if(userid==user.userid && userpw==user.userpw){
    //쿠키값을 생성한다.
    res.cookie('login',`${userid}`,{
      path:'/',
      httpOnly:true,
      secure:true,
      domain:'localhost'
    })
    //login 성공 페이지로 이동한다
    res.render('user/login')
  }else{
    //로그인이 실패했을경우 홈으로 돌아간다
    res.redirect('/')
  }
})

3. 로그아웃할때 쿠키를 삭제하고 홈으로 돌아가는 기능을 만들자
//홈 url의 요청에 index.html을 넘겨주는 app.get
app.get('/', (req, res) => {
  //쿠키 읽기
  if(req.cookies.login!=undefined){
    //쿠키가 있으면 로그인페이지로.
    console.log(req.cookies)
    res.render('user/login')
  }else{
    //쿠키가 없으면 메인으로.
    res.render('index')
  }
})

app.get('/logout', (req, res) => {
  console.log(req.cookies)
  const userid = req.cookies.login
  //쿠키 삭제하기
  res.clearCookie(`login`,`${userid}`,{
    httpOnly:true,
    secure:true
  })
  res.render('index')
})
쿠키 암호화 기능 만들기
로그인을 할때 암호화 기능을 넣는다.
app.post('/login', (req, res) => {
  //전달받은 값을 변수에 각각 넣는다
  const userid = req.body.userid;
  const userpw = req.body.userpw;

  //로그인이 성공했을 경우
  if(userid==user.userid && userpw==user.userpw){
    //쿠키값을 생성한다.
    res.cookie('login',`${userid}`,{
      path:'/',
      httpOnly:true,
      secure:true,
      domain:'localhost',
      signed:true //암호화
    })
    res.render('user/login')
  }else{
    //로그인이 실패했을경우
    res.redirect('/')
  }
})
로그인을 한 후 홈에서 암호화된 정보를 갖고있는지 확인한다.
//홈 url의 요청에 index.html을 넘겨주는 app.get
app.get('/', (req, res) => {

  //암호화된 쿠키 내용을 갖고있는지 확인
  if(req.signedCookies.login){
    console.log("암호화된 쿠키", req.signedCookies.login)
  }

  //쿠키 읽기
  if(req.cookies.login!=undefined){
    //쿠키가 있으면 로그인페이지로.
    console.log(req.cookies.login)
    res.render('user/login')
  }else{
    //쿠키가 없으면 메인으로.
    res.render('index')
  }
})
이제 기존에 있던 로그인 기능이랑 합쳐넣자.
로그인을 정상적으로 이루어놨으므로 암호화가 되었다는 소리니까, 기존에 있던 로그인 확인 기능을 지웠다.
//홈 url의 요청에 index.html을 넘겨주는 app.get
app.get('/', (req, res) => {

  //쿠키 읽기
  if (req.signedCookies.login) {
    console.log("암호화된 쿠키", req.signedCookies.login)
      res.render('user/login')
  } else {
    //쿠키가 없으면 메인으로.
    res.render('index')
  }
})'실천하기 > 한 입씩 먹는 홈페이지 만들기' 카테고리의 다른 글
| 09. 라우터로 복잡한 코드 분리하기 / express (0) | 2024.03.19 |
|---|---|
| 07. CRUD - TO DO LIST 만들기 / nodemon, chokidar (0) | 2024.03.18 |
| 06. CRUD - 글 수정기능 만들기 (0) | 2024.03.17 |
| 05. CRUD - 삭제 기능 만들기 (1) | 2024.03.17 |
| 04. CRUD - 상세페이지 만들기 (0) | 2024.03.17 |


댓글